Lateral Flow: Three Tips for Injection Molding
How to Ensure A Smooth Transition from R&D to Production for Lateral Flow Products
We regularly encounter situations where product developers using lateral flow were so focused on creating a product that works that when production ramps up, the operations manager comes to us for help in overcoming challenges with assembly, quality, etc. To be fair, we rarely see an outright case of “throwing it over the wall,” but we almost always identify missed opportunities, which could have saved time, budget, and headache. Here we use a diagnostics example to highlight some common pitfalls in designing lateral flow for injection molding and how to avoid them.
3 Recommendations for Design
- Design the cassette to fit the assay
- Test and adjust your product design early and often
- Invest in your design now for future flexibility
1 – Cassette Designed to Fit the Assay
Misstep #1: Do you have any stock cassettes that fit my test?”
This is often the first question development teams will ask. Teams often assume that if a stock cassette is close enough, a few quick adjustments to the strip will cheaply speed things along. However, when the cassette is not specifically designed to “fit” the assay with the correct features and locations, the following can occur:
- Inadequate pressure from sample pad to conjugate causes pooling on the membrane
- Excessive pressure blocks flow and reduces performance
- Inconsistent pressure points cause the flow to run too quickly or too slowly
- Insufficient pressure allows the wicking pad to curl up and slow migration
Lesson #1 – First Identify Needs, then Find Solutions
First, the team will identify the needs and requirements for your specific design. A properly designed, custom test should manage these risks. Starting with an analysis of the strip dimensions and the tolerances around the key variables sets the stage for designing the housing around these parameters to improve sensitivity and repeatability of your test results by:
- Calibrating the pressure for the sample pad to the conjugate pad
- Adjusting the location and capacity of the sample well and moat
- Adapting the pressure points for the wicking pad to draw the flow from the membrane
2 – Test and Adjust Product Design Early
Misstep #2 – “Can you just scan and copy?”
Reverse engineering a complex, sensitive test can pose problems. If the original is on the hairy edge of tolerance, this can result in performance issues. The industry is regularly improving, so simply copying an older design preserves all of its design flaws. All too often, the design phase is rushed, and by the time the need for improvement has been realized, the test has already been validated.
Lesson #2 – Adjust Early
Engage your design and manufacturing partner early enough to allow for flexibility in adjusting both cassette and strip to optimize results at the lowest cost and greatest speed. This can improve transfer and result in a better flow.
3 – Invest for Future Flexibility
Misstep #3 – “I have a new test. Do I need a new mold?”
When selecting your initial mold, begin with the end in mind. Rapid tools do not bring the same level of flexibility as a well-built R&D tool with the proper insert configuration. Although rapid tools are less of an initial investment, moving to a new test often means scrapping the previous tool and starting all over again. Over time the extra time and costs necessary for each variation will add up.
Lesson #3 – Design for Flexibility to Lower Costs and Risks
The initial investment in inserts can quickly pay off. Being able to try out a new window or strip can happen more quickly and at a lower cost with inserts rather than with an entirely new tool. The benefit is that the same tool used by R&D for development can be used for the initial production runs, in some cases well over 500,000 shots.
Additionally, changing only a focused area lowers the risk that something will get worse in another area. We have even seen cases where a client needed one feature from one test, combined with another feature from another test, and because these were inserted, they could easily mix and match, requiring absolutely no new build at all. With the rapid tool approach, the new variation would have required an entirely new tool.
Reducing Risks with Molding for Lateral Flow
Hidden problems can crop up later in the process and end up being much more costly and time consuming than if risks were identified and mitigated early in the process. The later those risks are addressed, the fewer options are available to reduce their impact. Adequately managing these risks early and avoiding common pitfalls can save time and money, and it results in better performance.
Natech Plastics consistently supports rapid assay product launches, with over 12 million rapid assay housings manufactured per year. Our engineering team is experienced in assisting clients with designing products that can scale from initial testing to production. Connect with a Natech engineer to help with your project.
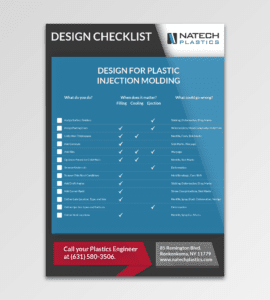
Download Design for Injection Molding Checklist
The Design for Injection Molding Checklist includes 13 key considerations for designing for injection molding, along with explanations for when each consideration matters and what risks are associated with those considerations.